It feels like a while since I've done my last food related post (go figure, because it has been about half a year), so when my brother had to make something for a picnic he was attending, it seemed like an opportune moment for me. I had actually already had another post planned, which I was in the middle stages of making, but since I haven't had really any quality content for you guys recently, I thought this would be a nice change to the system. Also the post that I had planned, which I think you can expect next week, is a right old ramble and I didn't think you'd want that.
Apologies for the lack in quality of the photos. I had a little tantrum in the middle of the making-of-the-baking process in which my brother (considerately) took the photos for me. I'm not saying that his photo taking capabilities are limited (I mean, he only took three photos on his recent trip overseas), but I am just saying that we were all a little stressed. A tip for next time, if you want to bake when your family is home, set some strict ground rules. For example, four people in the kitchen at once is not a good idea.
Before I ramble on some more, here you go.
Preparation Time: give or take 30 mins | Cooking Time: give or take 30 mins | Serves about 16
You will need:
- melted butter or greasing paper (or both) for greasing
- 20 cm square cake tin
- 250 g dark chocolate, roughly chopped or in small pieces for easy melting (chocolate buttons work well)
- 2 Tbsp vegetable oil
- 2 Tbsp low fat milk
- 2 cups almond meal
- 5 eggs, separated
- 1/2 cup Caster Sugar
- Optional: Icing sugar for dusting, or ice with whatever you want
- Optional: paper cut outs in shapes
Method:
- Preheat oven to 160oC. If you are using butter, grease the base and sides of your cake tin; if you are using baking paper, line your tin. Or do both, like me!
- Put your chocolate, oil and milk in a bowl over a saucepan of simmering water (make sure it's not touching the water) and stir with a metal spoon until the chocolate is melted and silky. Set aside to cool slightly.
- Put your chocolate mixture, almond meal, egg yolks and sugar in a bowl and mix to combine.
- Put the separated egg whites into an electrical blender until stiff peaks form.
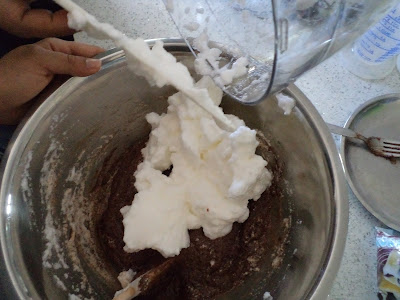
- Fold 1/2 the egg whites into the chocolate mixture first. Then add the remaining egg whites into the mixture, once incorporated.
- Spoon the mixture into the prepared tin.
- Bake for 30 minutes or until the cake is firm to touch. Allow to cool completely before cutting the cake into 16 slices.
- If you're feeling creative, cut out little templates (in paper will do) and place them on top of your cake squares and dust over them (with icing sugar)
- Enjoy your good cakeness yums.
- While enjoying your yums, make sure you appreciate my poorly added and taken creative shots. I mean, some thought went it to these, albeit limited.
Now the icing is completely up to you but make sure your cake has cooled completely before you add any icing. The last thing you want is runny, goop-y icing on your beautiful creation. Also keep in mind that any cracks that occur in your bake are normal and perfectly fine - they will be just as most and enjoyable! It just adds a little more character. I prefer to just add icing sugar to the top and leave it at that, but obviously it's up to you. I hope you enjoy it.
Much love,
Duchess


No comments:
Post a Comment